Walking at a quicker pace will get your heart rate up and is easier on your joints than other types of exercise. You can walk anywhere at any time. All you need is a pair of supportive shoes. Do a short walk during your lunch break or a longer walk on the weekend. You can listen to music, a podcast, or walk with a friend. The flexibility of walking makes it easy for anyone to do.
Strength Training
Building the other muscles in your body will help your heart. Weight training will help you build muscle mass and burn fat. Although you can hit the gym to train with weights, some of the most effective weight training happens when you use your own body weight. Things like push-ups, squats, or even pull-ups all help you build muscle and contribute to bone and heart health.
Swimming
Taking a water aerobics class or swimming laps can be a full-body workout that will strengthen not only your body, but your heart.
Yoga
Doing yoga will help you strengthen and tone your muscles. Certain types of yoga can really get your heart rate up, while still providing the calm that will lower your blood pressure.
Interval training
Interval training alternates between short bursts of high-intensity exercise with longer periods of active recovery — is a great way to get a full-sized workout in a short amount of time. For example, you can do it by running for one minute and walking for three minutes, then repeating the cycle. Raising and lowering of your heart rate helps to burn calories and improves the function of your blood vessels.
Cycling
Cycling has been shown to help reduce the risk of heart disease. It uses your large muscles in your legs, which helps to elevate your heart rate.
Whether you choose to hit a yoga class three times a week, go walking with a friend, or swim every morning, regular exercise is essential to taking care of your heart. Always talk to your doctor before you begin an exercise routine.
This salmon dish, inspired by simple Mediterranean flavors, tastes divine and is good for you, too!
CAL/SERV:
306
YIELDS:
4
PREP TIME:
0 hours 15 mins
TOTAL TIME:
0 hours 20 mins
INGREDIENTS
6 clove garlic
1 lb. green beans
1 pt. grape tomatoes
1/2 c. pitted Kalamata olives
3 anchovy fillets
2 tbsp. olive oil
kosher salt
Pepper
1 skinless salmon fillet
This ingredient shopping module is created and maintained by a third party, and imported onto this page. You may be able to find more information about this and similar content on their website.
DIRECTIONS
Heat oven to 425 degrees F. On a large rimmed baking sheet, toss together the garlic, beans, tomatoes, olives, and anchovies (if using) with 1 tablespoon oil and 1/4 teaspoon pepper. Roast until the vegetables are tender and beginning to brown, 12 to 15 minutes.
Meanwhile, heat the remaining tablespoon oil in a large skillet over medium heat. Season the salmon with 1/4 teaspoon each salt and pepper and cook until golden brown and opaque throughout, 4 to 5 minutes per side. Serve with the vegetables.
Control your blood pressure It is very important to get your blood pressure checked regularly – at least once a year for most adults, and more often if you have high blood pressure.
Eat a healthy diet. Try to limit saturated fats, foods high in sodium, and added sugars. Eat plenty of fresh fruit, vegetables, and whole grains.
Stay at a healthy weight. Being overweight or having weight issues can increase your risk for heart disease. This is mostly because they are linked to other heart disease risk factors, including high blood cholesterol and triglyceride levels, high blood pressure, and diabetes.
Get regular exercise. Exercise has many benefits, including strengthening your heart and improving your circulation. It can also help you maintain a healthy weight and lower cholesterol and blood pressure. All of these can lower your risk of heart disease.
Limit alcohol. Drinking too much alcohol can raise your blood pressure. Men should have no more than two alcoholic drinks per day, and women should not have more than one.
Keep your cholesterol and triglyceride levels under control. High levels of cholesterol can clog your arteries and raise your risk of coronary artery disease and heart attack. High levels of triglyceride may also raise the risk of coronary artery disease, especially in women.
Manage diabetes. Having diabetes doubles your risk. High blood pressure from diabetes can damage your blood vessels and the nerves that control your heart and blood vessels. So, it is important to get tested for diabetes, and if you have it, to keep it under control.
Don’t smoke. Cigarette smoking raises your blood pressure and puts you at higher risk for heart attack and stroke. If you do not smoke, do not start. You can talk with your health care provider for help in finding the best way for you to quit.
Manage stress. Stress is linked to heart disease in many ways. It can raise your blood pressure. Extreme stress can be a “trigger” for a heart attack. Also, some common ways of coping with stress, such as overeating, heavy drinking, and smoking, are bad for your heart. Some ways to help manage your stress include exercise, listening to music, focusing on something calm or peaceful, and meditating.
Make sure that you get enough sleep. If you don’t get enough sleep, you raise your risk of high blood pressure, obesity, and diabetes. Those three things can raise your risk for heart disease. Most adults need 7 to 9 hours of sleep per night. If you have frequent sleep problems, contact your healthcare provider. This interferes with your ability to get a good rest and can raise your risk of heart disease.
Cardiovascular diseases are a group of disorders of the heart and blood vessels which are:
Coronary heart disease- disease of the blood vessels supplying the heart muscle.
Cerebrovascular disease- disease of the blood vessels supplying the brain.
Peripheral arterial disease- disease of blood vessels supplying the arms and legs.
Rheumatic heart disease- damage to the heart muscle and heart valves from the rheumatic fever, caused by streptococcal bacteria.
Congenital heart disease malformations of the heart structure existing at birth.
Deep vein thrombosis and pulmonary embolism- blood clots in the leg veins, that can dislodge and move to the heart and lungs.
Heart attacks and strokes are caused by blockages so blood can’t flow to the heart or brain. The most common reason for this is a buildup of fatty deposits. Strokes can also be caused by bleeding from a blood vessel in the brain or from blood clots. Tobacco use, unhealthy diet and obesity can result in heart attack or stroke.
Dr. Ajit Naidu leads the team of professional medical staff at Cardiovascular Institute of the Shoals. He was the first physician in the Shoals to offer radial artery cardiac catheterizations and coronary interventions, laser varicose vein ablation, and advanced techniques in peripheral vascular intervention.
While he works toward treating an array of cardiovascular issues with the most cutting-edge technology and an emphasis on patient care, one disease he is determined to fight is Coronary Artery Disease (CAD). CAD is diagnosed as a buildup of plaque or a blockage in one of the arteries near the heart muscle.
Treatments for this condition vary from patient to patient, but can range from stent procedures, angioplasty, or even bypass surgery. One way Dr. Naidu has been able to treat his patients for Coronary Artery Disease is by encouraging a routine of exercising, eating a healthy and balanced diet, and by taking medication to fight against this disease.
CAD and other cardiovascular diseases may have grim outlooks sometimes, but Dr. Naidu is compassionate and understanding with his patients, while encouraging them to take control of their lives and of their diseases. Coronary Artery Disease doesn’t have to be fatal. And with Dr. Naidu’s determination for his patients, it won’t be.
It is crucial to find the right fit for all of your medical needs, but especially for your cardiovascular health. When it comes to issues of the heart and vascular systems, you want to place your life in hands that you can trust.
Cardiovascular Institute of the Shoals is made up of a group of medical professionals in Northwest Alabama. We use cutting edge technology, our own knowledge and professional experience, and all-around patient care to provide the best experience for our patients.
We know that cardiovascular issues can be scary, but they often can lead to bigger medical issues, the longer they persist. This is why we all work together to provide an environment of information–we want to inform our patients of the root of the issues here. But we also work to create an environment of compassion and empathy. Our patients never have to face their medical issues alone; we do whatever is necessary to help heal the issue and ease the mind.
It is our goal to see and treat people with issues from Hypertension and Coronary Artery Disease, to Restless Leg Syndrome and Peripheral Artery Disease. It’s our mission to end the pain and suffering of thousands of people in the Shoals and surrounding areas who suffer in silence from painful, yet treatable diseases that severely diminish the quality of life. It is our goal to see that quality of life restored. For life to be lived.
We want to restore the faith in doctors, in medical teams, and in the advancement of medical technology by providing our patients with the best care. It’s all about putting our patients’ needs first, really listening and treating the roots of the problem, and then seeing our patients live long and happy lives, free of the ailments that plagued them and sent them to Cardiovascular Institute of the Shoals to begin with.
Christmas is here, and that means one thing…all the food is available all the time. But there’s good news! You can eat your seasonal favorites, but in a lightened up way, and they’re actually delicious! We’ve put together a few of our festive favorites just for you.
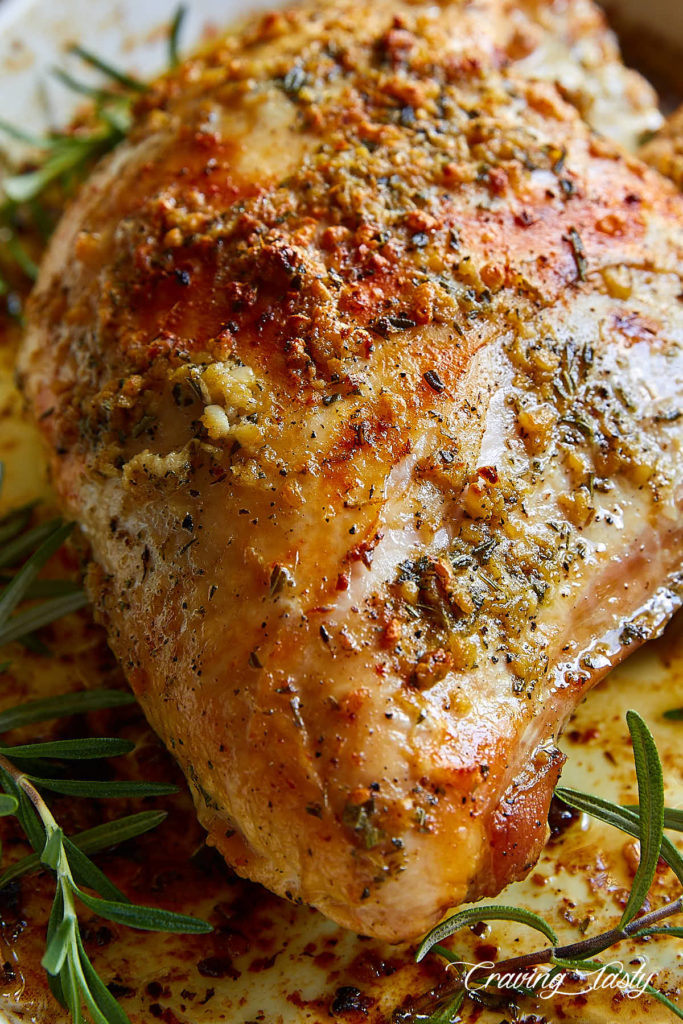
ROASTED TURKEY BREAST WITH HERB BUTTER
From cravingtasty.com
Prep Time: 10 minutes
Cook Time: 1 hour 15 minutes
Total Time: 1 hour 25 minutes
Ingredients:
1 bone-in, skin-on turkey breast (about 2 – 2.5 lbs)
8 garlic cloves (minced)
1 stick unsalted butter
1 TBS rosemary (fresh, finely chopped)
1/2 tsp dry thyme (finely ground)
1/2 tsp black pepper (finely ground)
2 tsp kosher salt
Instructions:
Preheat oven 325F
In a microwave-safe bowl, combine the butter, 1 tsp of kosher salt, garlic, rosemary, pepper and thyme
Microwave the ingredients on high for 1 minute, or until the butter has fully melted. Remove the bowl from the microwave oven. Mix all the ingredients really well and set aside for 5 minutes so the butter gets infused with the garlic and herbs.
Return the bowl back to the microwave and cook the mixture for another 30 seconds to ensure that the butter is fully liquefied.
Strain the butter mixture through a fine sieve. Save the garlic and herbs.
Place the turkey breast in a baking dish, skin side up. Cover with a piece of plastic wrap to prevent the butter from accidentally squirting all over the kitchen. Fill the kitchen injector with the strained butter and inject the breast all over, in a diamond pattern, releasing about 1/4 – 1/3 of an ounce at a time.
Add the garlic and herbs that saved earlier. Rub the garlic and herb mixture and the butter from the bottom of the baking dish all over the turkey breast.
Evenly sprinkle 1 tsp of kosher salt all over the breast and pat it down to make sure the salt sticks.
If using a BBQ thermometer (highly recommended), insert the probe into the thickest part of the turkey breast and connect to the thermometer.
Bake at 325F for about 1 hour or so, until the internal temperature in the thickest part of the breast reaches 155F. Brush the top of the breast with the pan juices about an hour into roasting.
Remove from the oven and let the roasted turkey breast rest for 5 minutes before slicing and serving.
Notes:
If you want your roasted turkey breast to have nicely browned, crispy skin, do the following:
Bake the turkey breast until internal temperature reaches about 10 degrees below the final temperature
Brush the top of the breast with pan juices
Turn on the broiler to low
Continue cooking with the broiler function turned to low until the turkey breast’s internal temperature reaches target temperature.
Make sure to keep a close eye on your turkey breast during broiling to prevent burning. If you see the skin has browned enough and the internal temperature has not hit the target, switch back from broil to bake, and cover the breast with foil.
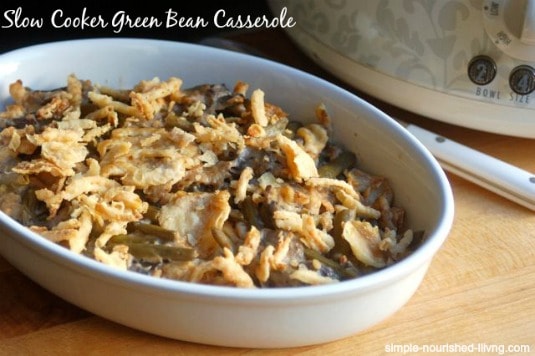
SLOW COOKER GREEN BEAN CASSEROLE
From simple-nourished-living.com
Prep Time: 15 minutes
Cook Time: 5 hours
Total Time: 5 hours 15 minutes
Ingredients:
1 pound fresh green beans (about 4 cups)
6 ounces fresh mushrooms
1 can (10.75 ounces) fat-free cream of mushroom soup
1 tsp soy sauce
1/8 tsp ground black pepper
1 cup French fried onions
Instructions:
Ideal slow cooker size: 2 Quart
Coat your slow cooker with nonstick spray
Wash and trim green beans. Cut them into even lengths and toss into slow cooker
Clean the mushrooms with a damp paper towel. Trim the stems. Cut into slices and add to the slow cooker.
Add the soup, soy sauce, black pepper and 1/2 cup fried onions and stir to combine
Cover and cook on low for 4 to 6 hours, or HIGH for 2 to 3 hours until the green beans have reached their desired tenderness.
Remove the cover, turn off the slow cooker and sprinkle on the remaining 1/2 cup of onions. Let sit, uncovered for 10 minutes.
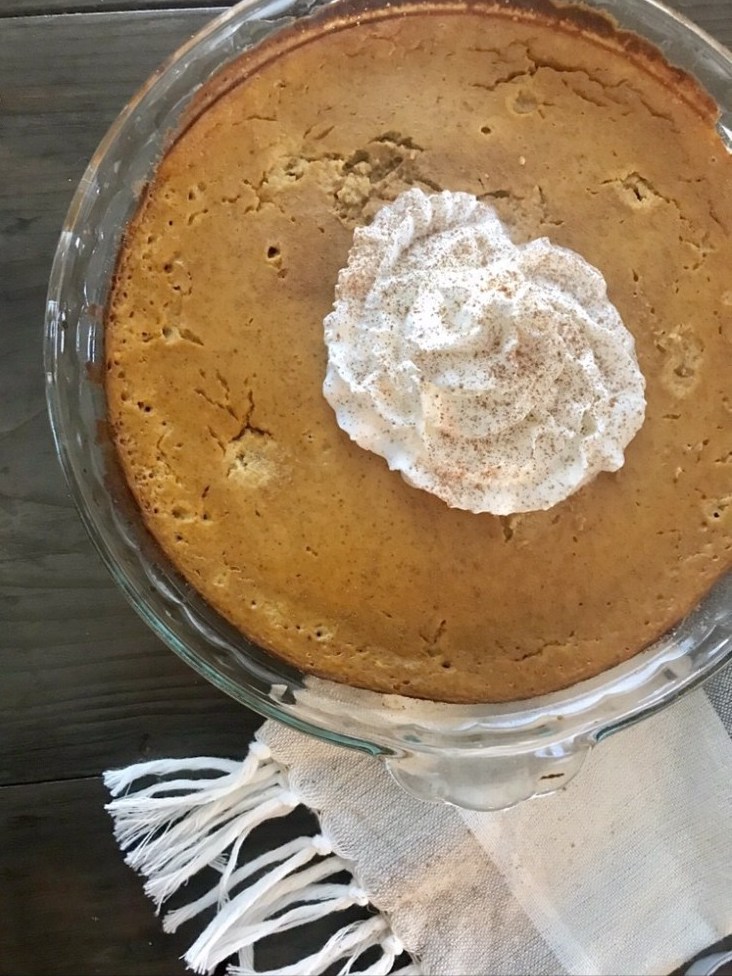
WW ZERO POINT CRUSTLESS PUMPKIN PIE
From thepounddropper.com
An easy recipe for homemade pumpkin pie. This Zero Point Crustless Pumpkin Pie recipe is perfect for fall—it’s so good—you won’t regret making this for your next family gathering!
Prep Time: 5 minutes
Cook Time: 45 minutes
Total Time: 50 minutes
Ingredients
1 (15 oz) can 100% canned pumpkin purée
1/3 cup Sukrin Gold or any granulated sugar substitute (I use Sukrin Gold, if you use another brand of sugar substitute, be sure to check the points. Sukrin Gold is 0 WW Freestyle Smart Points)
1 tsp cinnamon
1/2 tsp nutmeg
1/2 tsp vanilla extract
1 tsp pumpkin spice (I use sodium-free, all natural Dak’s Pumpkin Spice)
2 large eggs
8 oz. unsweetened almond milk
Instructions
Preheat oven to 375 degrees
Spray a 9 inch pie dish with nonstick cooking spray
In a large mixing bowl, combine all ingredients and mix until all ingredients are well combined
Pour into dish. Bake for 40-45 minutes or until knife inserted in the center comes out clean
Servings: Makes 6 slices / 0 WW Freestyle Smart Points per slice
Notes:
You can add a crust using the two-ingredient dough
Ingredients for optional crust:
1/2 cup self rising four
1/2 cup nonfat Greek yogurt
Directions:
Preheat oven to 375 degrees
Mix together both ingredients. Store until incorporated. Knead and roll dough on parchment paper. Using a roller, roll dough out, shaping it into a 10 inch circle.
Place dough into a 9 inch greased pie dish. Cook for 12-14 minutes. Take out of oven and add pie filling. Put back into oven for an additional 30-35 minutes.
Servings: Makes 6 slices / 1 WW Freestyle Smart Point per slice
This time of year, it seems like it’s all about the food! Thanksgiving is right around the corner, and it won’t be long until Santa comes to town. We want to help make your life a little easier when it comes to navigating the kitchen this holiday season. We’re giving you some of our favorite diabetic-friendly recipes that you can make in the Instant Pot!
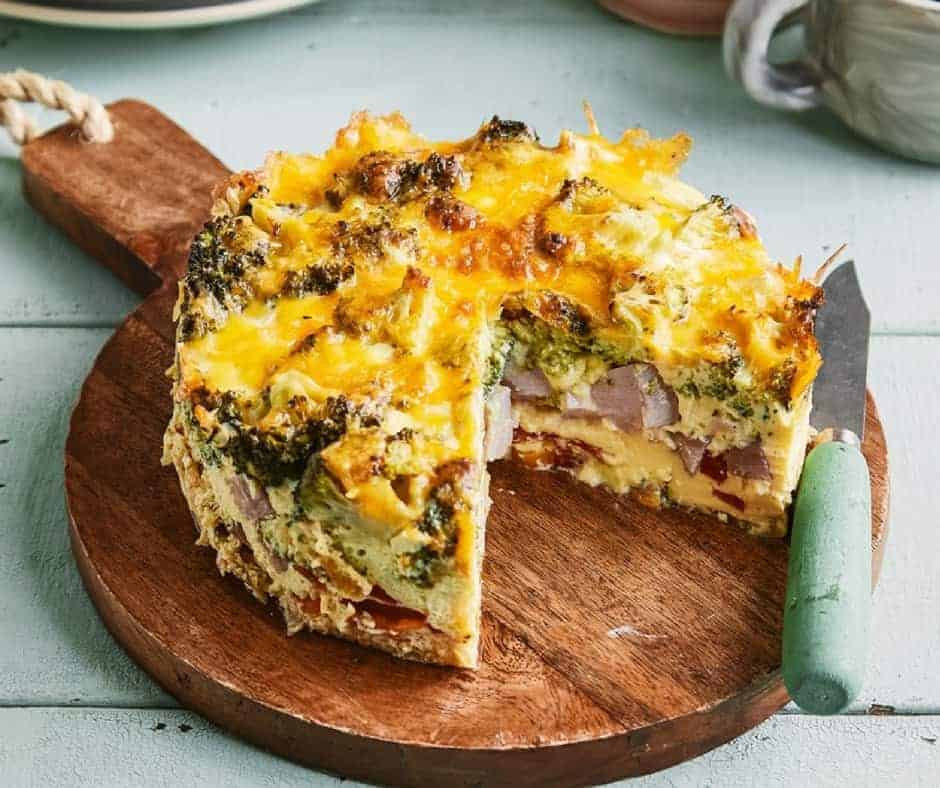
Grease a 6×3 pan extremely well. I mean, EXTREMELY well. You do not want to be scraping out egg because you forgot to grease a corner. I used a silicone brush to get oil or butter into every crevice of my pan.
Arrange the sliced sweet peppers in the bottom of the pan
Place the cubed ham on top of it
Cover with frozen broccoli. Before you ask me, yes, this will work with fresh broccoli as well, I used frozen because that’s what I had.
In a mixing bowl, whisk together the eggs, half and half, salt and pepper
Stir in shredded cheese
Pour the egg mixture on top of your vegetables and cover with foil or a silicone lid
In the inner liner of your instant pot or pressure cooker, place 2 cups of water
Place a steamer rack on top of this
Place the covered pan on the steamer rack
Cook on high pressure for 20 minutes. Allow it to release pressure naturally for 10 minutes, then release all remaining pressure.
Let it sit for 5-10 minutes. Using a knife, gently loosen the sides of your wondrous creation. Place a plate on top of the pan, and thump out the frittata onto the plate. If you want the ham and pepper side up, you’re done. If you want the cheese side up, flip it on a plate once more.
You can broil for 3-4 minutes to get the cheese to melt or serve as is.
RECIPE NOTES:
Substitutions that will likely work:
Fresh broccoli for frozen
Other veggies instead of broccoli and pepper, but do not use mushrooms as they will release too much water
Dairy-free milks
Individual servings in jars or ramekins—cook 4-5 minutes
Yes, this reheats well. No, I would not freeze it.
If you don’t use ham, use some other cooked meat. Raw meats will release too much water. Chicken sausage, roast beef chunks, smoked sausage, etc.
In a nutshell, everything is going into the Instant Pot for 20-ish minutes.
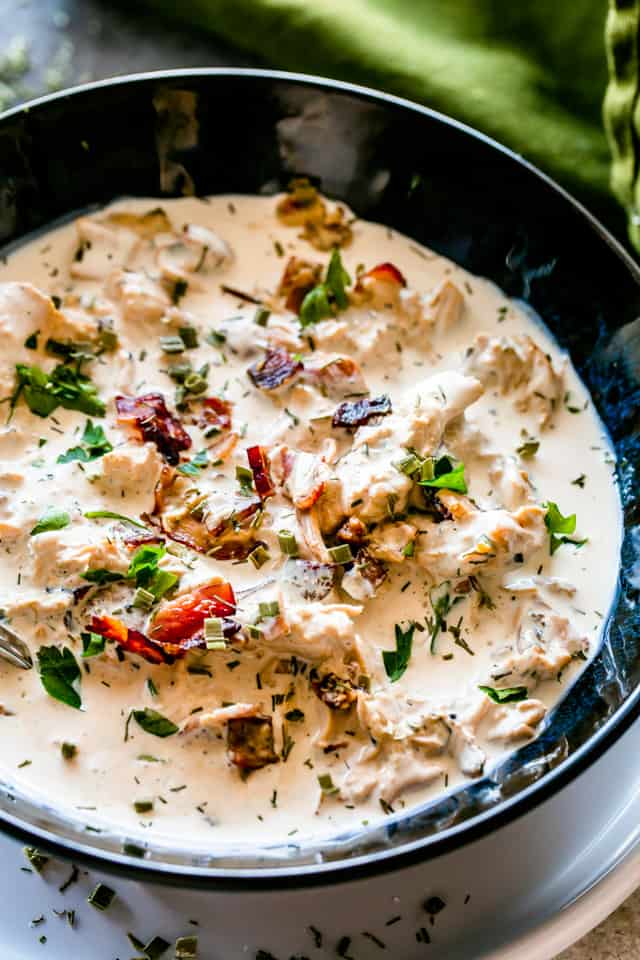
Start with heating up your Instant Pot and add diced bacon; cook for a couple minutes, or to a desired crispness. Remove bacon and set aside.
Heat some oil in the Instant Pot and brown your chicken breasts on all sides, for about 2 minutes per side. You don’t have to brown the chicken – it’s up to you – but I think it’s better if you do.
Add chicken broth to the Instant Pot, plus a block of cream cheese, and your ranch seasoning mix that includes; dried dill, dried chives, garlic powder, onion powder, salt, and pepper.
Cook on HIGH PRESSURE for 12 minutes, then do a quick release.
Remove chicken from the Instant Pot and shred it.
Stir the chicken back into the Instant Pot; place the lid back on the Instant Pot (powered off) and let stand for 5 minutes to thicken the sauce.
HOW TO MAKE CRACK CHICKEN IN YOUR CROCK POT OR SLOW COOKER:
Add the chicken, cream cheese, AND ranch seasoning to a slow cooker; cook on low for 5 to 6 hours or on high for 3 to 4 hours. OR, until chicken shreds easily. Once shredded, toss it back in the slow cooker and stir. Add in crumbled bacon and serve.
COOK’S NOTES: TIPS FOR PERFECT CHICKEN
IF the sauce is too thick, stir in a bit of water.
IF the sauce is too thin, make a slurry with cornstarch and a little cold water; mix until smooth. Stir the mixture into the hot liquid until it’s blended.
You can use a Ranch Seasoning packet if you want, but I suggest making it from scratch. The store-bought stuff has too much sodium.
WHAT DO YOU EAT CRACK CHICKEN WITH?
Crack chicken is basically a chicken filling meant to be used in sandwiches, but we can always go a step further and add crack chicken to:
Salads
Lettuce Wraps
Low Carb Flour Tortillas
You can also serve it as a dip for veggies.
Obviously, Instant Pot Crack Chicken is an easy dinner recipe, the kind of dish that requires very minimal work on your part. All you have to do is get out your Instant Pot, toss in the ingredients, and turn up the heat. Then, EAT!
CAN YOU FREEZE CRACK CHICKEN?
Yes, you absolutely can.
Let it cool down completely; then transfer it to a large freezer bag or airtight container. Store in the freezer for up to 3 months.
When ready to serve, remove from freezer the night before and let thaw in the fridge overnight.
Reheat and serve.
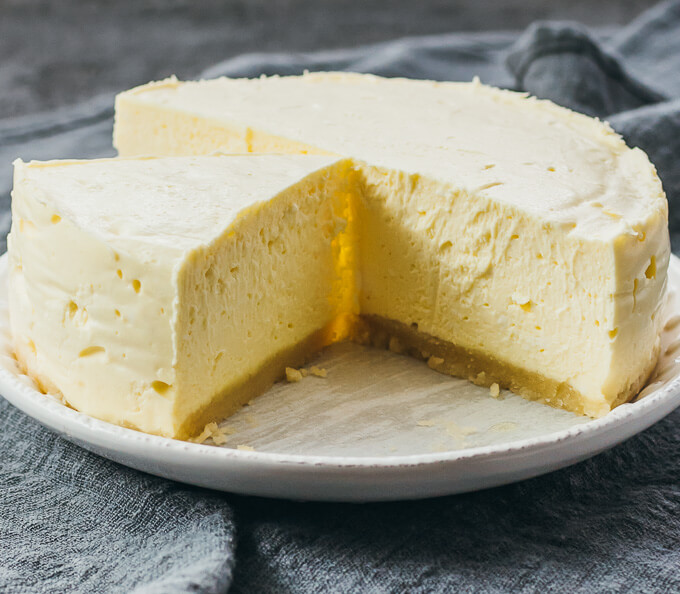
LOW CARB INSTANT POT CHEESECAKE (KETO RECIPE)
From savorytooth.com
A quick and easy recipe for keto/low carb cheesecake made in the Instant Pot pressure cooker, with a gluten-free almond flour crust.
16 ounces of cream cheese, softened to room temperature
4 ounces (2/3 cup) powdered erythritol sweetener
2 large eggs at room temperature
2 ounces (1/4 cup) heavy whipping cream at room temperature
1 TBS lemon juice
1 tsp vanilla extract
INSTRUCTIONS:
Preparation:
Remove cold ingredients (cream cheese, eggs, heavy cream) from the refrigerator and allow them to warm to room temperature. Start this 30 minutes before proceeding with the rest of the recipe.
Prepare a steam rack or the trivet that came with your pressure cooker, ideally with lifting handles
Prepare an aluminum 6-inch round cheesecake pan with removable bottom or springform pan. Line the bottom and sides of the pan with separate pieces of parchment paper.
Make the crust:
Combine melted butter and erythritol in a mixing bowl, and stir together. Add almond flour, stirring until the butter is absorbed and forms a dough.
Transfer the dough to the cheesecake pan. Use a spoon or measuring cup to firmly press down to form a flat and smooth crust covering the entire bottom of the pan.
Transfer the fan to the freezer to chill the crust for 20 minutes while you work on the filling.
Make the filling:
Add cream cheese and erythritol to a large bowl. Use a hand mixer to beat on low speed until well-mixed, about 1 minute.
Add heavy cream, lemon juice, and vanilla extract. Beat on low speed until smooth, about 30 seconds.
Add eggs one at a time, beating on low speed until just combined, about 30 seconds each. Don’t overmix the eggs.
Remove the pan with chilled crust from the freezer. Pour the batter over the crust, careful not to leave trapped air gaps. Flatten the surface using a spatula.
Cook and cool:
Add 1 cup of water to the bottom of the pressure cooker. Place the trivet over the water, with its handles resting on the sides of the pot. Place the cheesecake pan on top of the trivet
Secure and seal the lid. Cook for 30 minutes at high pressure, followed by a 15 minute natural release. Manually release any remaining pressure by gradually turning the release knob to its venting position.
Carefully lift the lid to avoid dripping condensation on the cheesecake. The top of the cheesecake should be jiggly but not liquid. If needed, use a paper towel to carefully dab at the cheesecake to absorb any condensation on its surface. Turn off the pressure cooker.
Let the cheesecake cool uncovered in the pressure cooker. After about an hour, lift it from the pot using the trivet’s handles to cool on the countertop.
After it has cooled, loosely drape a paper towel over the cheesecake pan and refrigerate for at least 24 hours. Do not seal tightly because the cheesecake needs to dehydrate.
Carefully remove the chilled cheesecake from the pan. Peel off the parchment paper. Slice and serve.